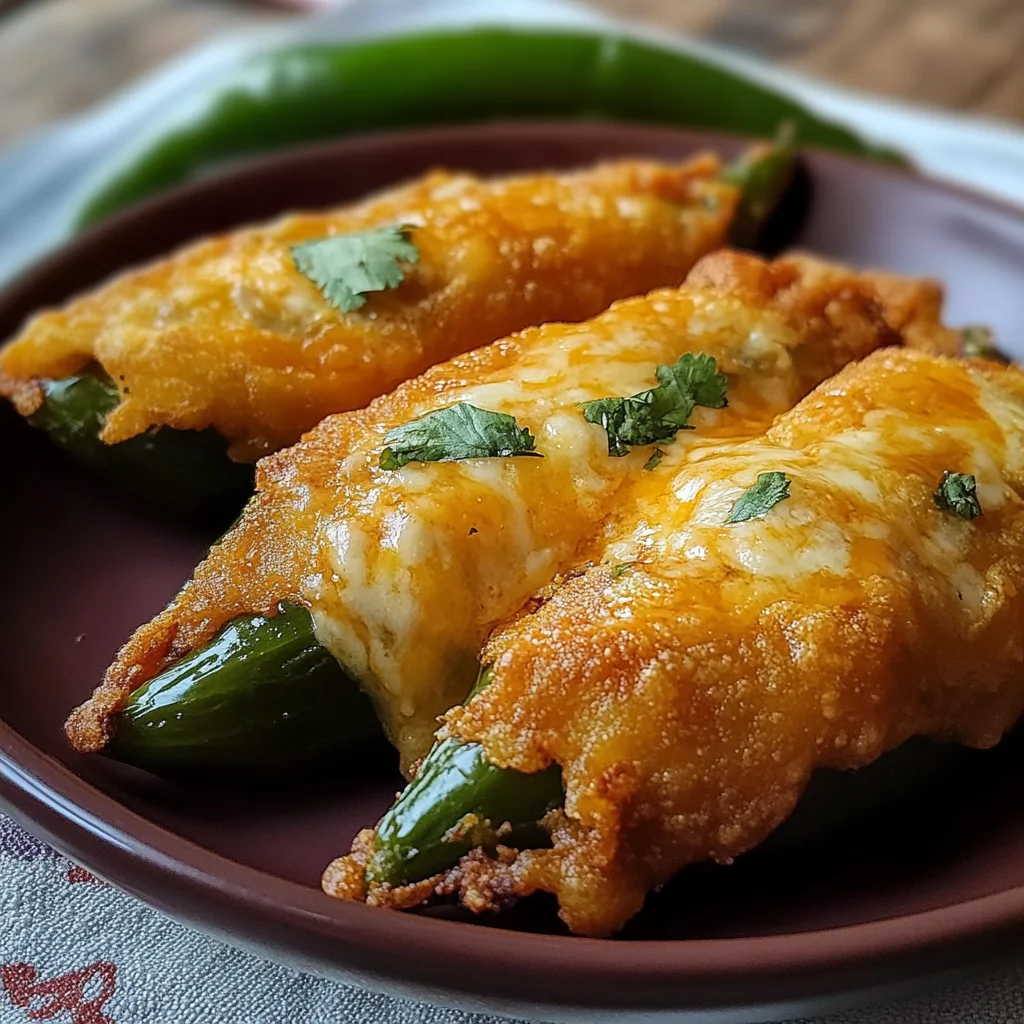
Cheesy Hatch Chile Rellenos
Delight in the rich flavors of Cheesy Hatch Chile Rellenos with this simple and satisfying recipe. These stuffed chiles are perfect for gatherings, family dinners, or a cozy night in. With a crispy exterior and gooey cheese filling, they offer a delicious blend of textures and tastes that will impress any crowd.
Why You’ll Love This Recipe
- Flavor-packed experience: The combination of roasted hatch chiles and melty cheese creates an irresistible flavor that stands out.
- Versatile dish: Enjoy them as an appetizer, main course, or even for brunch; they fit perfectly into any meal.
- Easy to make: Step-by-step instructions ensure that even beginner cooks can master this delightful dish.
- Customizable: Feel free to add your favorite toppings or adjust spice levels to suit your taste.
- Perfect for sharing: Great for parties or potlucks, these cheesy chiles will be a hit with everyone.
Tools and Preparation
Before you start cooking, gather your tools and prepare your workspace. Having everything ready will make the process smooth and enjoyable.
Essential Tools and Equipment
- Baking sheet
- Gallon-sized ziplock bag
- Mixing bowls
- Blender
- Deep pan for frying
- Slotted spoon
Importance of Each Tool
- Baking sheet: Allows for even roasting of the chiles, ensuring optimal flavor.
- Blender: Perfectly blends sauce ingredients into a smooth consistency for a delicious topping.
- Deep pan: Provides enough space to fry multiple chiles at once for quicker cooking times.

Ingredients
For the Chiles
- 8 hatch green chiles
- 8 to 10 oz Oaxaca cheese (or a similar melting cheese)
- 6 large eggs, separated
- 2/3 cup all-purpose flour
- 1 tsp salt
- 1 tsp garlic powder
- Vegetable oil, for frying
For the Sauce
- 5 medium tomatoes (Roma or any fresh variety)
- 1 small white onion
- 5 garlic cloves
- 2 tbsp chopped cilantro
- 1 tsp salt
- (Optional) 1/4 cup sliced jalapenos
How to Make Cheesy Hatch Chile Rellenos
Step 1: Prepare the Chiles
- Place the hatch green chiles on a foil-lined baking sheet.
- Broil them for 5-10 minutes until the skins are blackened and blistered in spots.
- Flip the chiles and broil for another 5-10 minutes.
- Remove from the oven and transfer to a gallon-sized ziplock bag. Let them steam for 10-15 minutes.
Step 2: Stuffing the Chiles
- Once cool enough to handle, peel off the skins gently from each chile.
- Cut a slit down one side of each chile and remove the seeds carefully.
- Stuff each chile generously with Oaxaca cheese or a similar melting cheese.
- Use 1-2 toothpicks to seal each chile closed.
Step 3: Prepare Egg Batter
- Separate the eggs, placing whites in one bowl and yolks in another cup.
- Beat egg whites on high speed until stiff peaks form.
- Reduce speed to low and slowly incorporate yolks into egg whites until light and foamy.
Step 4: Dredge the Chiles
- In a shallow dish, mix all-purpose flour, salt, and garlic powder together.
- Set up an assembly line with stuffed chiles, flour mixture, and egg batter for easy frying.
Step 5: Frying Time
- Heat vegetable oil in a deep pan to 350°F (175°C).
- Dredge each stuffed chile in flour mixture then dip into egg batter fully coating it.
- Gently place in hot oil; fry for 2-3 minutes on one side before flipping over to fry another 2-3 minutes until golden brown.
Step 6: Make the Sauce
- Place tomatoes, white onion, garlic cloves, chopped cilantro, salt (and jalapenos if using) into a blender.
- Blend until smooth; transfer sauce to saucepan and heat over medium heat until boiling then reduce to low simmer.
Step 7: Serve
Plate hot fried chiles rellenos immediately with the red sauce from Step 6 on top or on the side. You can also add salsa verde or Mexican crema if desired! Enjoy your freshly made Cheesy Hatch Chile Rellenos while they’re piping hot!
How to Serve Cheesy Hatch Chile Rellenos
Cheesy Hatch Chile Rellenos are delicious on their own, but there are several ways to elevate your dining experience. Here are some creative serving suggestions that will make your dish even more enjoyable.
With Fresh Salsa
- Pico de Gallo: A fresh salsa made from diced tomatoes, onions, cilantro, lime juice, and jalapenos adds a zesty touch.
- Mango Salsa: A sweet and tangy mango salsa pairs beautifully with the heat of the chiles.
Topped with Creamy Sauces
- Mexican Crema: Drizzle some Mexican crema over the top for a rich and creamy flavor that complements the dish.
- Avocado Sauce: A smooth avocado sauce adds a delightful creaminess and enhances the overall taste.
Accompanied by Rice or Beans
- Spanish Rice: Serve with flavorful Spanish rice seasoned with spices for a hearty meal.
- Black Beans: A side of black beans offers protein and contrasts nicely with the cheesy filling.
Garnished with Fresh Herbs
- Chopped Cilantro: Sprinkling fresh cilantro on top brightens up the dish with color and flavor.
- Green Onions: Sliced green onions add a mild onion flavor and a nice crunch.
How to Perfect Cheesy Hatch Chile Rellenos
Creating the perfect Cheesy Hatch Chile Rellenos is all about attention to detail. Follow these tips for optimal results.
- Use Fresh Chiles: Choose firm, vibrant hatch chiles for the best flavor and texture.
- Stuff Generously: Don’t skimp on cheese; generous stuffing ensures every bite is cheesy and satisfying.
- Achieve Perfect Frying Temperature: Use a thermometer to maintain oil temperature at 350°F (175°C) for evenly fried chiles.
- Let Them Rest After Frying: Allowing them to rest on paper towels helps absorb excess oil without losing crispiness.
- Experiment with Cheese Types: While Oaxaca cheese is traditional, feel free to mix it with Monterey Jack or Pepper Jack for extra flavor.
- Customize Your Sauce: Adjust the sauce spices according to your preference; adding cumin or lime juice can enhance flavors.
Best Side Dishes for Cheesy Hatch Chile Rellenos
Pairing side dishes with Cheesy Hatch Chile Rellenos can create a balanced meal. Here are some great options to consider.
- Spanish Rice: A classic side that’s flavorful and complements the rich cheese in the rellenos. Simply sauté rice with onions and spices before cooking.
- Refried Beans: Creamy refried beans provide a hearty contrast; you can serve them plain or seasoned with garlic and cumin.
- Corn Salad: A refreshing corn salad made with diced peppers, red onion, lime juice, and cilantro adds freshness to your plate.
- Guacamole: Creamy guacamole pairs well with spicy flavors; serve it as a dip or spread over the rellenos for added richness.
- Grilled Zucchini: Lightly grilled zucchini drizzled with olive oil brings a healthy element that balances out the richness of the chiles.
- Cilantro Lime Quinoa: A light quinoa salad flavored with cilantro and lime makes for a nutritious side that’s easy to prepare.
Common Mistakes to Avoid
When preparing Cheesy Hatch Chile Rellenos, it’s easy to make a few common mistakes. Here are some tips to help you get it right.
- Not roasting chiles properly: Ensure the chiles are fully roasted until the skins are blackened. This step is crucial for flavor and easy peeling.
- Skipping the egg white beating: Beating the egg whites until stiff peaks form adds fluffiness. Don’t skip this step; it makes a big difference in texture.
- Overstuffing chiles: While it’s tempting to add a lot of cheese, overstuffing may cause the chiles to burst while frying. Stuff them generously, but don’t go overboard.
- Frying at the wrong temperature: Maintaining the oil at 350°F (175°C) is key. Too hot will burn them; too cold will make them greasy. Use a thermometer for accuracy.
- Not using enough salt in the batter: Salt enhances flavors. Don’t forget to add it to the flour mixture for better taste.
- Serving without sauce: These chiles are best served with a delicious sauce. Don’t skip this part for an extra burst of flavor.
Storage & Reheating Instructions
Refrigerator Storage
- Store Cheesy Hatch Chile Rellenos in an airtight container.
- They can last up to 3 days in the refrigerator.
Freezing Cheesy Hatch Chile Rellenos
- Wrap each chile individually in plastic wrap before placing them in a freezer-safe container.
- They can be frozen for up to 2 months.
Reheating Cheesy Hatch Chile Rellenos
- Oven: Preheat the oven to 375°F (190°C) and bake for 15-20 minutes until heated through.
- Microwave: Heat on medium power for 1-2 minutes, checking frequently to avoid overcooking.
- Stovetop: Reheat in a skillet over low heat, covering with a lid to keep moisture.
Frequently Asked Questions
Here are some common questions about making Cheesy Hatch Chile Rellenos.
Can I use different types of cheese?
Yes! While Oaxaca cheese is recommended, you can use any melting cheese like Monterey Jack or mozzarella.
What if I can’t find hatch green chiles?
You can substitute with other mild green chiles such as Anaheim peppers or poblano peppers.
How spicy are these Cheesy Hatch Chile Rellenos?
The spiciness depends on the type of chiles used. Hatch chiles are generally mild, but if you want more heat, consider adding jalapeños.
Can I make this recipe ahead of time?
Absolutely! You can prepare and stuff the chiles ahead of time and fry them just before serving.
What is the best sauce for serving?
A fresh tomato sauce pairs perfectly with these cheesy rellenos, but salsa verde or even a creamy dressing works well too.
Final Thoughts
Cheesy Hatch Chile Rellenos offer a delightful combination of flavors and textures that anyone can enjoy. They are versatile enough to customize with different cheeses and sauces based on your preference. Don’t hesitate to try this recipe and make it your own!
Cheesy Hatch Chile Rellenos

Delight in the vibrant flavors of Cheesy Hatch Chile Rellenos, a dish that brings together the smoky essence of roasted hatch chiles and the creamy goodness of melted cheese. Perfect for any occasion, these stuffed peppers are a crowd-pleaser, whether served at a family gathering or enjoyed on a cozy night in. With a crispy exterior and cheesy interior, they offer an irresistible combination of textures and tastes. Plus, this recipe is easy to follow, making it accessible for cooks of all skill levels. Customize with your favorite toppings or sauces for a personalized touch!
- Prep Time: 30 minutes
- Cook Time: 20 minutes
- Total Time: 50 minutes
- Yield: Serves 4
- Category: Dinner
- Method: Frying
- Cuisine: Mexican
Ingredients
- 8 hatch green chiles
- 8 to 10 oz Oaxaca cheese (or similar melting cheese)
- 6 large eggs, separated
- 2/3 cup all-purpose flour
- 1 tsp salt
- 5 medium tomatoes
- 1 small white onion
- 5 garlic cloves
- Vegetable oil for frying
Instructions
- Preheat your oven’s broiler and place chiles on a foil-lined baking sheet. Broil until skins are blistered and blackened, flipping halfway.
- Transfer chiles to a ziplock bag to steam for 10-15 minutes. Once cool, peel skins off and remove seeds.
- Stuff each chile with Oaxaca cheese and secure with toothpicks.
- In one bowl, beat egg whites until stiff peaks form; in another, mix yolks until frothy.
- Dredge stuffed chiles in flour mixture, dip into egg batter, and fry in hot oil until golden brown.
- Blend tomatoes, onion, garlic, and salt until smooth; heat sauce in a saucepan.
- Serve fried chiles hot with sauce on top.
Nutrition
- Serving Size: 2 stuffed chiles (200g)
- Calories: 400
- Sugar: 5g
- Sodium: 600mg
- Fat: 24g
- Saturated Fat: 9g
- Unsaturated Fat: 11g
- Trans Fat: 0g
- Carbohydrates: 32g
- Fiber: 4g
- Protein: 18g
- Cholesterol: 210mg